Best Way to Change Baby Diaper: Expert Tips for New Parents
The best way to change a baby diaper is to gather all supplies first and keep your baby safe. Follow a step-by-step routine for efficiency.
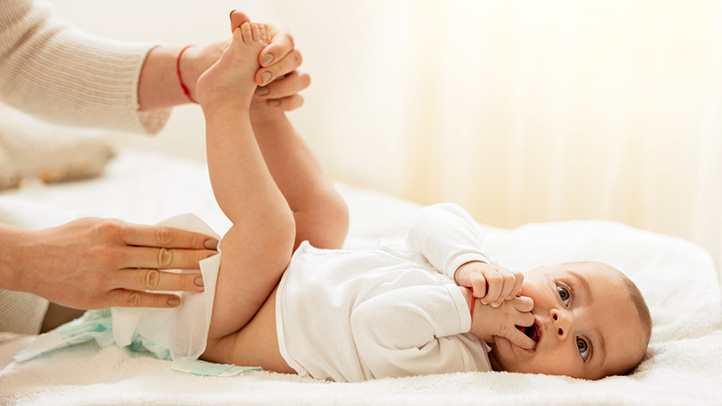
Changing a baby’s diaper is an essential skill for all parents and caregivers. A well-organized diaper change ensures your baby stays clean and comfortable. Begin by preparing all necessary items like a clean diaper, wipes, and a changing mat. Lay your baby on a safe, flat surface.
Remove the soiled diaper, clean the baby’s bottom, and slide a fresh diaper under them. Secure the diaper snugly but not too tight. Dispose of the used diaper properly and wash your hands thoroughly. This method keeps your baby happy and prevents diaper rash.
Choosing The Right Diapers
Selecting the right diaper can make a huge difference. Comfort and fit are crucial for your baby’s happiness. Let’s explore the different types of diapers and how to choose the best size and fit.
Cloth Vs. Disposable
Parents often debate between cloth and disposable diapers. Each has its own advantages and drawbacks.
| Cloth Diapers | Disposable Diapers |
|---|---|
|
|
Consider your lifestyle and budget. Cloth diapers need regular washing. Disposable ones are handy for travel and outings.
Size And Fit
Choosing the right size is crucial for preventing leaks and ensuring comfort. Here are some guidelines for finding the perfect fit:
- Check weight guidelines on the diaper package.
- The diaper should fit snugly around the waist and legs.
- Ensure there are no red marks. This indicates the diaper is too tight.
- Look for adjustable tabs. They help in getting a secure fit.
- Change sizes as your baby grows. Frequent checks are important.
A proper fit will keep your baby comfortable and happy. Always monitor for any signs of discomfort or leaks. Regularly check the fit and adjust as needed.
Credit: www.youtube.com
Essential Supplies
Changing a baby’s diaper requires more than just the diaper itself. Having the right essential supplies makes the process smoother and more efficient. Below are key items you’ll need.
Wipes And Creams
Baby wipes are crucial for cleaning your baby’s skin. Choose wipes that are gentle and fragrance-free to avoid irritation. Here are some options:
- Water-based wipes
- Sensitive skin wipes
- Eco-friendly wipes
Diaper creams help prevent and treat diaper rash. Opt for creams with zinc oxide for effective protection. Common types include:
- Barrier creams
- Natural ointments
- Medicated creams
Changing Stations
A dedicated changing station keeps all your supplies organized. It also ensures a clean and safe area for your baby. Consider the following:
| Type | Features |
|---|---|
| Portable changing pad | Lightweight, easy to clean |
| Changing table | Storage shelves, safety straps |
| Changing mat | Waterproof, cushioned |
Ensure your changing station is at a comfortable height. This avoids back strain. Keep all supplies within arm’s reach. Safety is always a priority.
Preparing For A Diaper Change
Changing a baby’s diaper can be easy if you prepare well. This guide will help you set up and gather everything you need.
Setting Up The Area
First, find a clean and safe spot for changing. You can use a changing table or a soft mat on the floor. Make sure the area is free of sharp objects. Safety comes first when handling your baby.
| Location | Pros | Cons |
|---|---|---|
| Changing Table | Convenient height, storage space | Needs close supervision |
| Floor Mat | Safe, no risk of falling | Less comfortable for parents |
Gathering Supplies
Keep all supplies within arm’s reach. You need a fresh diaper, baby wipes, and diaper cream. Having everything ready makes the process smooth.
- Fresh Diaper: Choose a size that fits your baby well.
- Baby Wipes: Ensure they are gentle on the skin.
- Diaper Cream: Helps prevent rashes.
- Disposal Bag: For the used diaper and wipes.
- Extra Outfit: In case of leaks or spills.
Organize your supplies in a basket or caddy. This keeps everything tidy and easy to find. Being organized saves time and stress during changes.
Step-by-step Guide
Changing a baby’s diaper might seem daunting, but it’s simple with practice. Follow this step-by-step guide to ensure a smooth diaper change every time.
Removing The Old Diaper
- Prepare the changing area: Lay a clean changing pad or towel.
- Gather supplies: Have wipes, a new diaper, and diaper rash cream ready.
- Lay the baby down: Gently place your baby on the changing pad.
- Unfasten the diaper: Open the tabs on the dirty diaper.
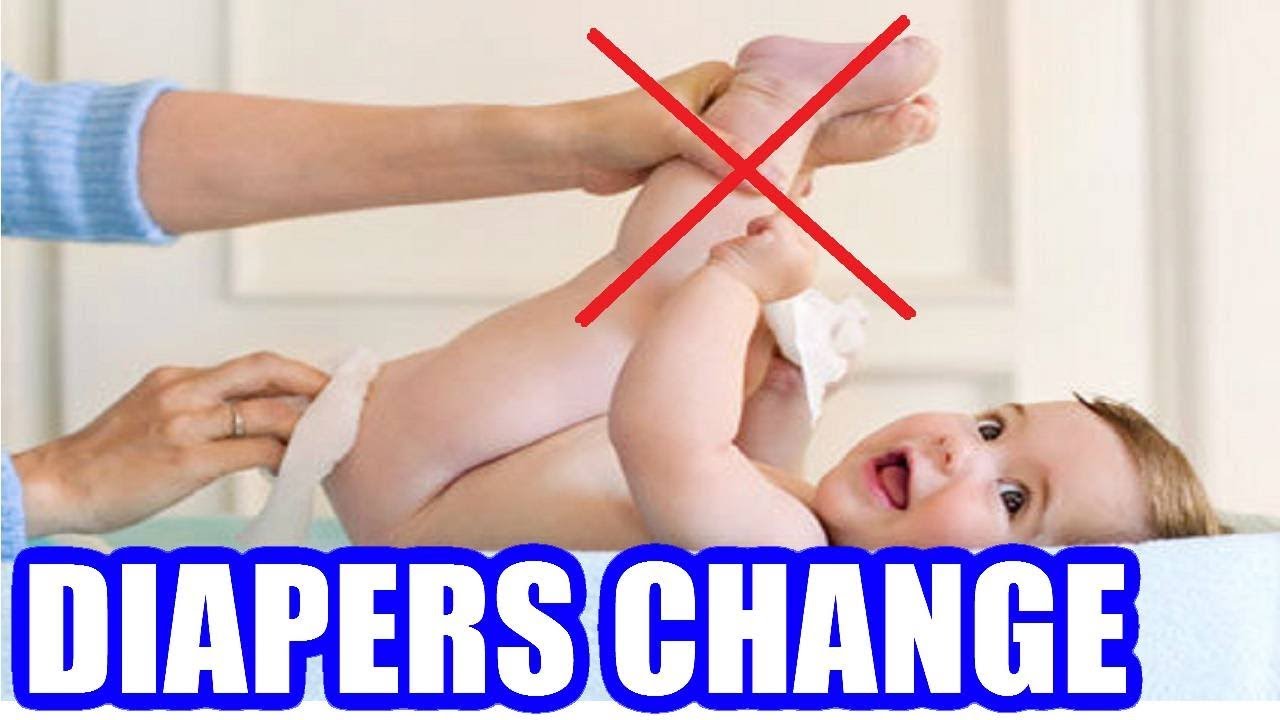
- Lift baby’s legs: Hold your baby’s ankles and lift their legs.
- Remove the dirty diaper: Slide the diaper out from under the baby.
- Dispose of the old diaper: Roll it up and secure it with the tabs.
Cleaning The Baby
- Use a clean wipe: Start wiping from front to back to prevent infection.
- Wipe thoroughly: Clean all creases and folds in the baby’s skin.
- Dry the area: Pat the baby’s bottom dry with a clean cloth.
- Apply diaper rash cream: If needed, apply a thin layer of cream.
By following these steps, you’ll ensure your baby stays clean and comfortable. Always have everything you need within reach. This helps make the diaper change quick and easy.
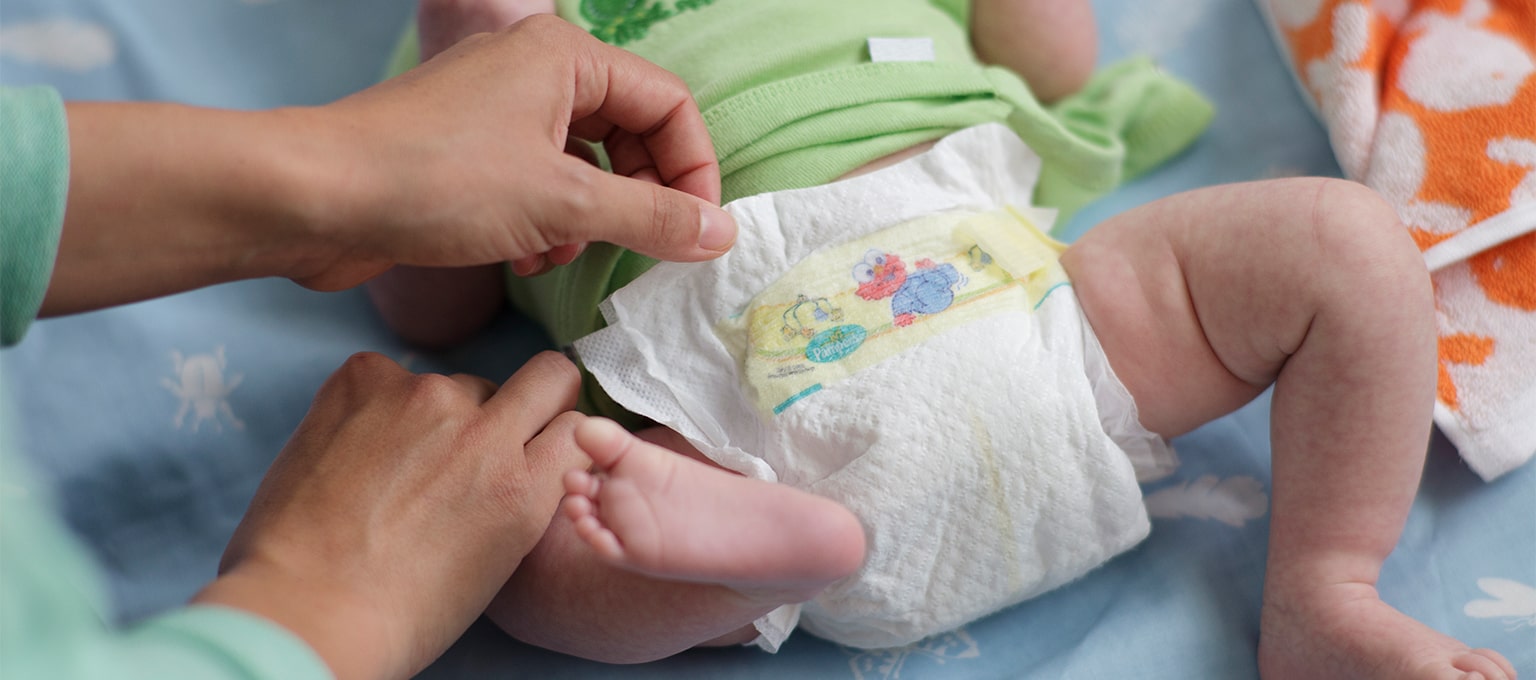
Putting On A New Diaper
Changing a baby’s diaper can be a simple task with the right steps. Here, we guide you through putting on a new diaper. Follow these steps to ensure your baby stays comfortable and dry.
Positioning The Baby
First, place your baby on a clean, flat surface. Use a changing table or a soft mat on the floor. Make sure the area is safe and free from objects that can hurt the baby.
Lift the baby’s legs gently by holding both ankles. Slide the new diaper under the baby with the back part at the waist level. The front part should cover the baby’s belly button.
Securing The Diaper
Next, bring the front part of the diaper up between the baby’s legs. Adjust the diaper to ensure it is snug but not too tight.
- Ensure the diaper tabs are on the sides.
- Pull the tabs around to the front.
- Secure each tab to the front of the diaper.
Check the fit around the baby’s legs. Adjust the diaper to prevent leaks. The diaper should be snug but allow room for movement.
Finally, dispose of the old diaper properly. Clean the changing area and wash your hands thoroughly.
| Step | Description |
|---|---|
| 1 | Position the baby on a safe, clean surface. |
| 2 | Lift the baby’s legs and slide the new diaper under. |
| 3 | Bring the front part of the diaper up between the legs. |
| 4 | Secure the tabs and adjust the fit. |
By following these steps, you can ensure a comfortable and secure fit for your baby’s diaper.
Handling Diaper Rash
Diaper rash can cause discomfort for your baby. It is essential to handle it promptly and effectively. Here are some key steps to prevent and treat diaper rash.
Prevention Tips
Preventing diaper rash is easier than treating it. Follow these tips to keep your baby’s skin healthy.
- Change Diapers Often: Check and change your baby’s diaper frequently.
- Clean Gently: Use warm water and a soft cloth to clean the diaper area.
- Pat Dry: Ensure the area is fully dry before putting on a new diaper.
- Diaper-Free Time: Give your baby some diaper-free time to let their skin breathe.
- Avoid Tight Diapers: Use diapers that are not too tight to avoid chafing.
- Use Barrier Creams: Apply a thin layer of barrier cream to protect your baby’s skin.
Treatment Options
If your baby develops a diaper rash, consider these treatment options to soothe and heal their skin.
- Frequent Changes: Change diapers immediately after they get wet or soiled.
- Gentle Cleaning: Use hypoallergenic wipes or warm water to clean the area gently.
- Air Time: Allow your baby’s skin to air dry as much as possible.
- Medicated Creams: Use over-the-counter creams like zinc oxide to treat the rash.
- Avoid Irritants: Avoid using scented wipes or lotions that may irritate the skin.
- Consult a Doctor: If the rash persists, consult your pediatrician for advice.
| Prevention Tips | Treatment Options |
|---|---|
| Change Diapers Often | Frequent Changes |
| Clean Gently | Gentle Cleaning |
| Pat Dry | Air Time |
| Diaper-Free Time | Medicated Creams |
| Avoid Tight Diapers | Avoid Irritants |
| Use Barrier Creams | Consult a Doctor |
Dealing With Diaper Blowouts
Every parent has faced the messy nightmare of a diaper blowout. It’s part of the parenting journey. Dealing with diaper blowouts can be challenging, but with the right tips, it becomes manageable. Read on to learn the best ways to handle these messy situations effectively.
Causes And Prevention
Understanding the causes of diaper blowouts helps in preventing them. Here are some common reasons:
- Wrong diaper size: A too-small diaper can’t contain the mess.
- Diaper positioning: Incorrectly placed diapers lead to leaks.
- Diet changes: New foods can cause unexpected blowouts.
To prevent diaper blowouts, follow these tips:
- Choose the right size: Ensure the diaper fits snugly.
- Check diaper alignment: Make sure it’s correctly positioned.
- Frequent changes: Change the diaper often to avoid overflows.
- Use high-quality diapers: Invest in reliable brands.
Cleaning Up Tips
Cleaning up after a diaper blowout can be daunting. Follow these steps for an easier cleanup:
- Stay calm: Keep your cool to handle the mess effectively.
- Gather supplies: Have wipes, a clean diaper, and a change of clothes ready.
- Remove the diaper: Carefully take off the dirty diaper, avoiding further mess.
- Clean the baby: Use baby wipes or a damp cloth to clean the skin thoroughly.
- Dispose of the mess: Wrap the dirty diaper in a disposable bag.
- Change clothes: Dress your baby in fresh, clean clothes.
- Sanitize hands: Wash your hands thoroughly after cleanup.
Dealing with diaper blowouts is a part of parenting. With these tips, you can handle them efficiently.

Credit: babycozy.com
Traveling With A Baby
Traveling with a baby can be both exciting and challenging. One of the biggest concerns is ensuring your baby stays clean and comfortable. Knowing the best way to change a baby diaper while on the go is essential. This guide will help you with practical tips and tricks for making diaper changes seamless during travel.
Portable Changing Kits
Portable changing kits are a lifesaver for traveling parents. These kits include everything you need for a quick and efficient diaper change.
Here are some key items to include:
- Changing pad: A clean surface for your baby.
- Diapers: Pack extra diapers for unexpected situations.
- Wipes: Essential for cleaning up messes.
- Hand sanitizer: Keeps your hands clean.
- Disposable bags: For dirty diapers and wipes.
Keep the kit in an accessible spot in your bag. This ensures you can quickly grab it when needed. A well-organized portable changing kit makes diaper changes stress-free.
Public Restroom Tips
Changing diapers in public restrooms can be tricky. Follow these tips for a smoother experience:
- Scout the restroom: Find a restroom with a changing table.
- Use a liner: Place a disposable liner on the changing table.
- Sanitize: Wipe down the changing area with sanitizing wipes.
- Stay organized: Have your supplies ready before starting.
- Disposal: Use a disposable bag for dirty diapers and wipes.
Public restrooms are not always baby-friendly. Be prepared for any situation. Always have your portable changing kit ready. This ensures your baby stays clean and happy throughout the journey.
Eco-friendly Diapering
Diapering your baby in an eco-friendly way helps the planet. It also ensures the well-being of your little one. Making small changes can have a big impact.
Sustainable Options
Choosing sustainable diapering options is key. Here are some choices:
- Cloth Diapers: Reusable and made from natural fibers.
- Biodegradable Diapers: Break down faster than regular ones.
- Hybrid Diapers: Have both reusable and disposable parts.
Cloth diapers are often made of cotton or bamboo. These materials are gentle on your baby’s skin. Biodegradable diapers decompose more quickly. This reduces landfill waste. Hybrid diapers offer the best of both worlds. They have a washable outer layer and a disposable insert.
Recycling Tips
Recycling helps keep waste out of landfills. Here are some tips:
- Rinse and Dry: Clean cloth diapers before recycling.
- Separate Components: Remove any non-biodegradable parts.
- Compost: Biodegradable diapers can go in compost bins.
Rinsing cloth diapers removes residues. This makes them easier to recycle. Separating components ensures proper disposal. Non-biodegradable parts should go into regular trash. Biodegradable diapers can break down in compost. This enriches the soil and reduces waste.
Using eco-friendly diapering methods helps the environment. It also ensures a healthier future for your child.
Credit: www.pampers.com
Frequently Asked Questions
How Do You Change A Baby Diaper?
To change a baby diaper, gather supplies first. Lay your baby on a clean surface. Remove the soiled diaper. Clean the baby’s bottom. Apply diaper cream if needed. Secure the new diaper snugly but not too tight.
What Supplies Do I Need For Diaper Changing?
For diaper changing, you need diapers, baby wipes, a changing pad, and diaper cream. Optional items include a diaper pail and hand sanitizer. Keep everything within reach to avoid leaving your baby unattended.
How Often Should I Change My Baby’s Diaper?
Change your baby’s diaper every 2 to 3 hours or when it is soiled. Frequent changes help prevent diaper rash and keep your baby comfortable. Always check for wetness and change promptly.
Can I Use Baby Wipes On Newborns?
Yes, you can use baby wipes on newborns, but choose unscented and alcohol-free wipes. These are gentle on sensitive skin. Alternatively, use a damp cloth for the first few weeks.
Conclusion
Changing a baby diaper becomes easy with practice and the right steps. Ensure you have all supplies ready. Always be gentle and attentive to your baby’s needs. Following these tips ensures your baby stays clean and comfortable. Happy diaper changing!