Yes, you can change a baby diaper. It requires basic supplies and simple steps to ensure cleanliness and comfort.
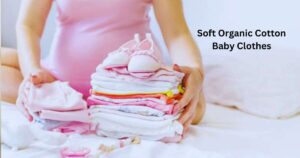
Changing a baby’s diaper is an essential caregiving skill for parents and caregivers. A clean diaper helps maintain the baby’s hygiene and prevents skin irritation. Gather all necessary supplies such as diapers, wipes, and a changing pad before starting. Ensure your hands are clean to avoid transferring germs.
Lay the baby on a secure, flat surface. Remove the soiled diaper, clean the baby’s bottom thoroughly, and apply a fresh diaper snugly. This routine not only keeps the baby comfortable but also helps in monitoring their health. Regular diaper changes are key to preventing diaper rash and maintaining overall well-being.
Preparing For Diaper Duty
Changing a baby’s diaper can seem tricky at first. Proper preparation makes it easier and faster. Let’s dive into how you can get ready for diaper duty.
Gather Supplies
Before changing the diaper, gather all necessary supplies. This ensures you won’t have to leave your baby unattended.
- Clean Diapers: Have at least two diapers on hand.
- Wipes: Use baby wipes or a damp cloth.
- Changing Pad: A soft, waterproof pad keeps surfaces clean.
- Diaper Cream: Prevents rashes and soothes baby’s skin.
- Disposal Bag: For disposing of soiled diapers.
- Extra Clothing: In case of leaks or spills.
Create A Clean Space
Set up a clean, safe area for changing. This can be a changing table or a clean floor space. Safety is key, so never leave your baby unattended on elevated surfaces.
Ensure the area is well-lit. This helps you see better and keeps your baby calm. Place the changing pad and supplies within arm’s reach.
| Item | Purpose |
|---|---|
| Changing Pad | Protects surfaces from messes |
| Diaper Cream | Prevents and treats rashes |
| Wipes | Cleans baby’s bottom |
Having a clean, organized space makes diaper changing quicker and stress-free.
Choosing The Right Diaper
Choosing the right diaper is essential for your baby’s comfort. The right diaper ensures your baby stays dry and happy. This guide will help you decide between cloth and disposable diapers. It also covers sizing to keep your baby comfortable.
Cloth Vs. Disposable
Cloth diapers are reusable and eco-friendly. They are made from natural materials. This makes them gentle on your baby’s skin. Cloth diapers can save money over time. They require washing after each use.
Disposable diapers are convenient and easy to use. They are designed for single use and then thrown away. Disposable diapers are often more absorbent. This can keep your baby dry for longer periods. They are more expensive over time and less eco-friendly.
The choice depends on your lifestyle and priorities. Consider your budget, convenience, and environmental impact.
Sizing Guide
Choosing the right diaper size is crucial. It ensures comfort and prevents leaks. Use the following table to find the right size based on your baby’s weight:
| Weight (lbs) | Diaper Size |
|---|---|
| < 8 | Newborn |
| 8-14 | Size 1 |
| 12-18 | Size 2 |
| 16-28 | Size 3 |
| 22-37 | Size 4 |
| 27+ | Size 5 |
Always check the diaper packaging for sizing guidelines. Babies grow fast. You might need to change sizes frequently. Ensure a snug fit around the waist and legs. This helps prevent leaks and keeps your baby comfortable.
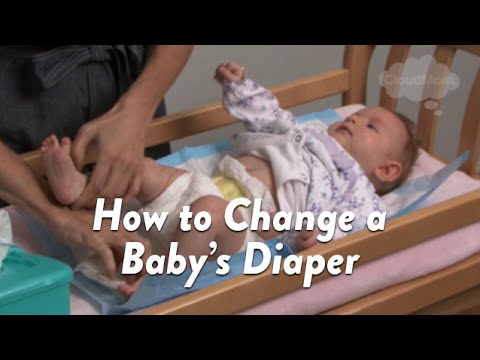
Step-by-step Changing Process
Changing a baby’s diaper can seem daunting, but it doesn’t have to be. By breaking down the process into simple steps, you can make it easier and more efficient. Follow our guide to ensure your baby stays clean and comfortable.
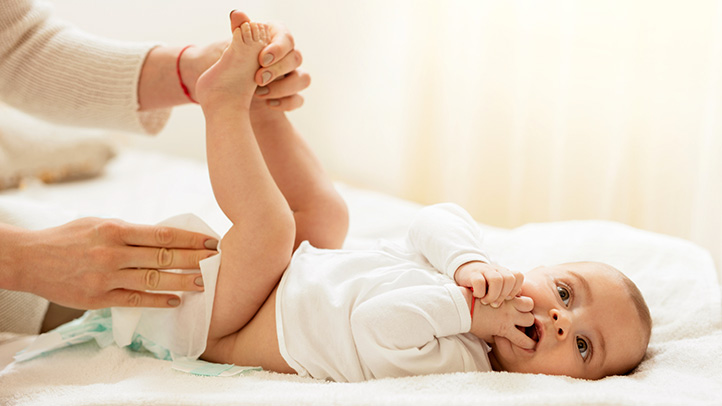
Removing The Dirty Diaper
First, gather all necessary supplies. You will need a clean diaper, baby wipes, and a diaper rash cream if needed. Place your baby on a safe, flat surface.
- Unfasten the dirty diaper tabs and fold them back.
- Lift your baby’s legs gently and slide the dirty diaper away.
- Dispose of the dirty diaper in a diaper pail or trash can.
Cleaning The Baby
Next, it’s time to clean your baby thoroughly. Use baby wipes or a damp cloth to wipe the diaper area. Make sure to clean all the creases and folds.
- Wipe from front to back to prevent infection.
- If your baby has a rash, apply diaper rash cream.
| Step | Action |
|---|---|
| 1 | Lift baby’s legs and wipe the bottom. |
| 2 | Use a fresh wipe for each pass. |
| 3 | Pat the area dry with a clean towel. |
Once your baby is clean, slide a new diaper under their bottom. Fasten the tabs snugly but comfortably. Ensure that the diaper fits well and isn’t too tight.
Congratulations! You’ve successfully changed your baby’s diaper. With practice, this process will become second nature. Your baby will appreciate the comfort of a fresh, clean diaper.

Credit: www.thebump.com
Applying Diaper Cream
Applying diaper cream is a crucial part of changing a baby’s diaper. It helps prevent diaper rash and keeps your baby comfortable. Knowing when and how to apply it can make a big difference.
When To Use
Diaper cream should be used during every diaper change. It’s especially important if your baby has sensitive skin or a history of diaper rash. Apply cream before putting on a new diaper. Use it more frequently if you notice redness or irritation. If your baby has a rash, use the cream to soothe and heal the skin.
How Much To Apply
Using the right amount of diaper cream is essential. A pea-sized amount is usually sufficient for newborns. As your baby grows, you may need to use a bit more. Spread the cream evenly over the affected area. Make sure to cover all the creases and folds. Applying too much can cause build-up and may be uncomfortable for your baby.
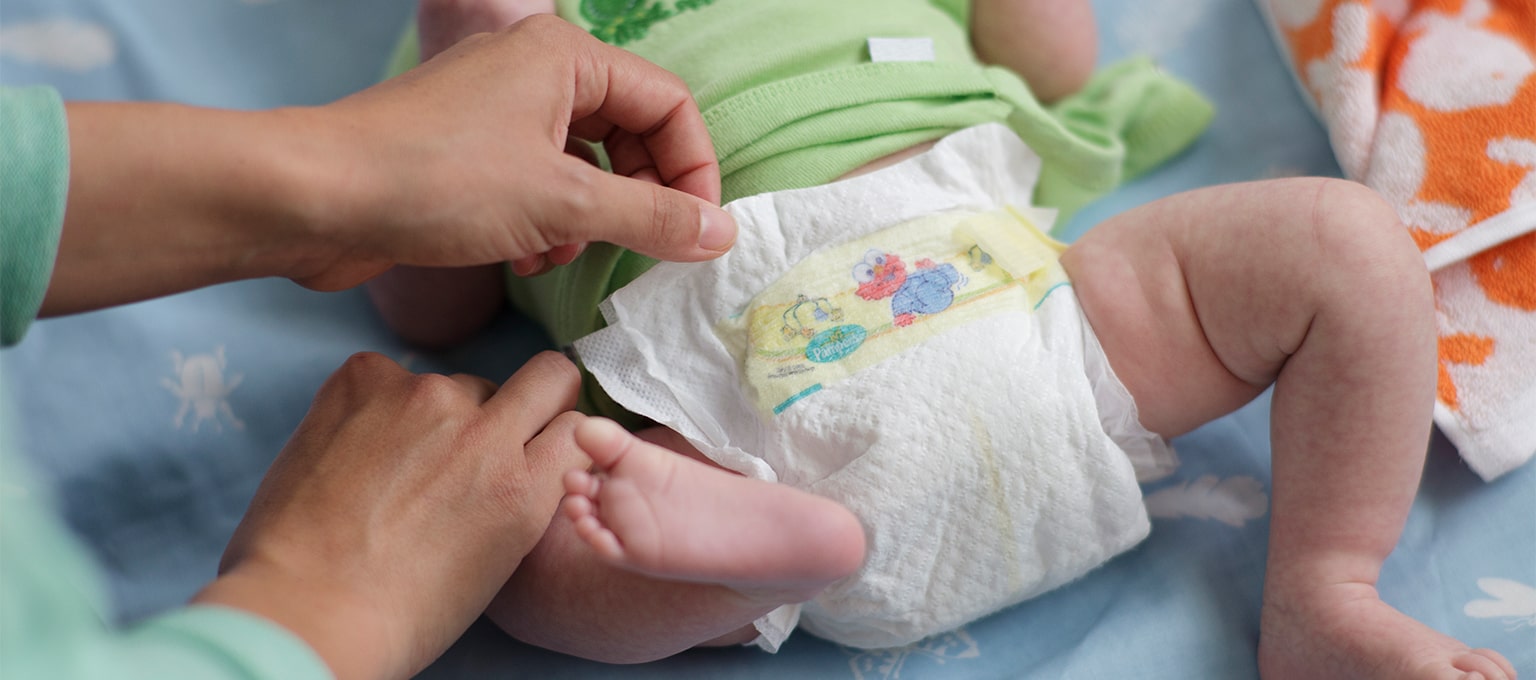
Securing The New Diaper
Securing a new diaper is crucial for your baby’s comfort and hygiene. Make sure the new diaper is properly placed and securely fastened. This helps in preventing leaks and ensures your baby stays dry.
Proper Placement
Place the diaper under your baby. The back side should be at waist level. Pull the front part of the diaper up. Ensure it covers the baby’s belly button. Fasten the adhesive tabs on both sides. The tabs should be snug but not too tight.
- Align the diaper with your baby’s belly button.
- Ensure the leg cuffs are pulled out properly.
- Check the back waistline for a snug fit.
Avoiding Leaks
Leaks can make your baby uncomfortable. To avoid leaks, follow these steps:
- Ensure the diaper fits well around the legs.
- Check the waistline for any gaps.
- Change the diaper frequently to prevent overflow.
| Step | Description |
|---|---|
| 1 | Place the diaper under the baby. |
| 2 | Pull the front part up. |
| 3 | Fasten the adhesive tabs snugly. |
| 4 | Check for any gaps around the legs and waist. |
Disposing Of The Dirty Diaper
Disposing of a dirty diaper can be tricky for new parents. Knowing the best practices helps keep your home clean and odor-free. Learn about different trash can options and environmentally-friendly disposal methods.
Trash Can Options
Choosing the right trash can for dirty diapers is crucial. It helps control odors and maintain hygiene. Here are some great options:
| Trash Can Type | Features |
|---|---|
| Diaper Pail | Sealed lid, odor control, designed for diapers |
| Regular Trash Can | Inexpensive, available in various sizes, needs frequent emptying |
| Touchless Trash Can | Hands-free, motion sensor, reduces germ spread |
Environmentally-friendly Disposal
Many parents seek environmentally-friendly ways to dispose of dirty diapers. Here are some options:
- Use biodegradable diaper bags. They break down faster than plastic bags.
- Consider cloth diapers. They can be washed and reused.
- Look for compostable diaper brands. These diapers decompose in compost facilities.
Proper disposal of dirty diapers keeps your home fresh and clean. Choose the right method for your family and the environment.
Common Mistakes To Avoid
Changing your baby’s diaper seems easy. But mistakes can happen. Avoid these common pitfalls to keep your baby happy and healthy.
Overtightening
Many parents make the mistake of overtightening the diaper. This can cause discomfort and skin irritation. A too-tight diaper can leave red marks on your baby’s skin.
- Ensure the diaper is snug but not too tight.
- You should be able to fit two fingers between the diaper and the baby’s belly.
Ignoring Rash Signs
Ignoring signs of a diaper rash can lead to severe issues. Look for redness, bumps, or swelling on your baby’s skin. These are early signs of a rash.
| Rash Sign | Action |
|---|---|
| Redness | Apply diaper rash cream |
| Bumps | Keep the area clean and dry |
| Swelling | Consult your pediatrician |
Always check your baby’s skin during each diaper change. This helps you catch rashes early and treat them quickly.
Credit: www.pampers.com
Tips For Diaper Changing On The Go
Changing a baby’s diaper while traveling can be challenging. Yet, with the right tips, it becomes manageable. Here are some essential tips for diaper changing on the go.
Portable Changing Kits
Always carry a portable changing kit. This kit should include:
- Diapers
- Wipes
- Changing pad
- Hand sanitizer
- Plastic bags for soiled diapers
Ensure everything is easily accessible. Choose a lightweight, compact kit. A well-prepared kit saves time and stress.
Finding Clean Spaces
Search for clean spaces to change your baby’s diaper. Good options include:
| Location | Why It’s Ideal |
|---|---|
| Public restrooms with changing tables | Designed for hygiene and convenience |
| Back seat of your car | Private and often clean |
| Park benches | Accessible and usually spacious |
If no clean space is available, use your portable changing pad. This ensures your baby stays clean and comfortable.
Credit: m.youtube.com
Frequently Asked Questions
How Often Should You Change A Baby Diaper?
You should change a baby’s diaper every 2-3 hours. Wet or soiled diapers should be changed immediately. Frequent changes prevent diaper rash and discomfort.
What Supplies Do You Need To Change A Diaper?
You’ll need a clean diaper, wipes, and a changing mat. Diaper rash cream and a plastic bag for disposal are also useful.
How Do You Prevent Diaper Rash?
Change diapers frequently to keep skin dry. Use a barrier cream and let the skin air out occasionally. Avoid tight diapers.
What Is The Proper Way To Dispose Of A Diaper?
Wrap the diaper tightly and use the adhesive tabs to seal it. Place it in a plastic bag and dispose of it in a diaper pail or trash can.
Conclusion
Changing a baby’s diaper is a simple task with the right guidance. With practice, it becomes second nature. Remember to stay calm and have all supplies ready. Your baby will appreciate your care and attention. Keep these tips in mind for a smoother diaper-changing experience.
Happy parenting!